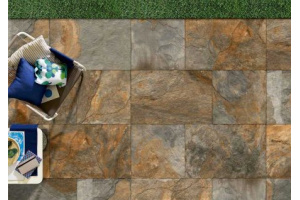
It’s the right time of year to be laying out a patio, as the weather should be good enough not just to lay it but enjoy it as well – whether you want to use it for eating, drinking, relaxing or just enjoying the rest of your garden.
Here Lumberjacks, who can provide either natural stone or porcelain paving from our Suffolk base, provide some top tips on how to make the whole process as simple as possible.
Plan It Out
This doesn’t just mean measuring the dimensions – it also means thinking about the rest of your garden. Many people prefer south-facing patios as this maximises the amount of sunshine it will get - but are there any trees close by which could cast a shadow over it (and could their roots grow underneath the slabs, potentially undermining it in years to come)? There’s also the issue of water run-off; ideally the patio should slope away from the house to ensure there isn’t any unwanted flooding or build-up of rainfall during the wetter months of the year.
You’ve also got to decide what type of patio paving slabs you want – natural stone or porcelain paving. At Lumberjacks, we can supply both of these to customers across Suffolk. For more information on the advantages each of these varieties have, check out our previous blog here.
Once you have made all these choices, you can mark the site out using string, pegs and a builder’s square. Be precise with this – any mistakes now could take a lot of time, effort, and money, to put right.
Prepare the Base Properly
Remove any weeds, turf, existing paving and soil and dig down around 6 inches (150mm) to allow space for the foundations as well as the slabs. Next, lay down some hardcore (usually to a depth of 50-80mm) then compact it. Add some bedding mortar on top of that.
At Lumberjacks we supply a variety of aggregates for patio bases, all of which can be found by clicking here.
Lay the Slabs
Start laying the slabs nearest to the house; the first one should always be on a corner. Use a rubber mallet to level it, as this will help avoid damaging the slabs. Use a spirit level to check everything is consistently flat; you can still adjust them if the mortar hasn’t set (for instance, you can remove some of the mix if any of the slabs are too high).
Add The Finishing Touches
Let the hardcore set before pointing or sealing the gaps in between the slabs – usually 24 hours should be enough as this will stop them from moving. The pointing can be done with cement; add more water if the mortar mix is too dry, or more sand and cement if it’s too wet. Press the mortar into the gaps using a trowel or pointing tool, and then brush away any excess to avoid staining the slabs. Remember you don’t have to use cement; EasyJoint and other sealants are also available.
Blackspots, mould and algae can thrive on patio slabs if they are damp or in shaded areas. To ensure you can keep your slabs in pristine condition you should treat it with special aftercare products which will keep these natural threats at bay.
Now you can enjoy your patio!
Porcelain and Natural Stone Paving in Suffolk from Lumberjacks
As well as all the various products listed above, we also have compiled our own handy ‘How to Lay a Patio’ guide which will point you in the right direction. This can be found here.
If you have any questions, about your new patio, feel free to call us on 01473 461394 or by following this link and filling in the online form.


